Putting fronts on the composting bins

Spent a very pleasant Sunday afternoon working on the composting bins. It's nice to be able to make at least some progress on them each week, it stops the project stagnating.
This week's target was to get the bins squared up and get the front cladding on.
Squaring up the bins
"Squaring up? Surely your bins are perfect?"
Well, in an ideal world they would be, and we'd certainly tried to keep the posts as vertical as possible as we'd driven them in. But errors do creep in, especially if you hit one of our garden's largish stones our on the way down. The end result is the bins were wider at the top than the bottom :-(.
I was going to use a piece of 1" x 1" battening to run across the front to strengthen it and allow me to get the front square(ish) again. But that plan fell by the wayside when I realised a number of things:
- The piece of battening I had in the garage was too short so I'd have to have bought some. Bad move. Always avoid spending money if possible :-)
- It wouldn't fit in with the aesthetic of the build as the rest of the outside is using the re-cycled decking as the cladding.
- I wasn't sure if the softwood battening would be strong enough to act as the pivot for the roof and to pull the posts square again.
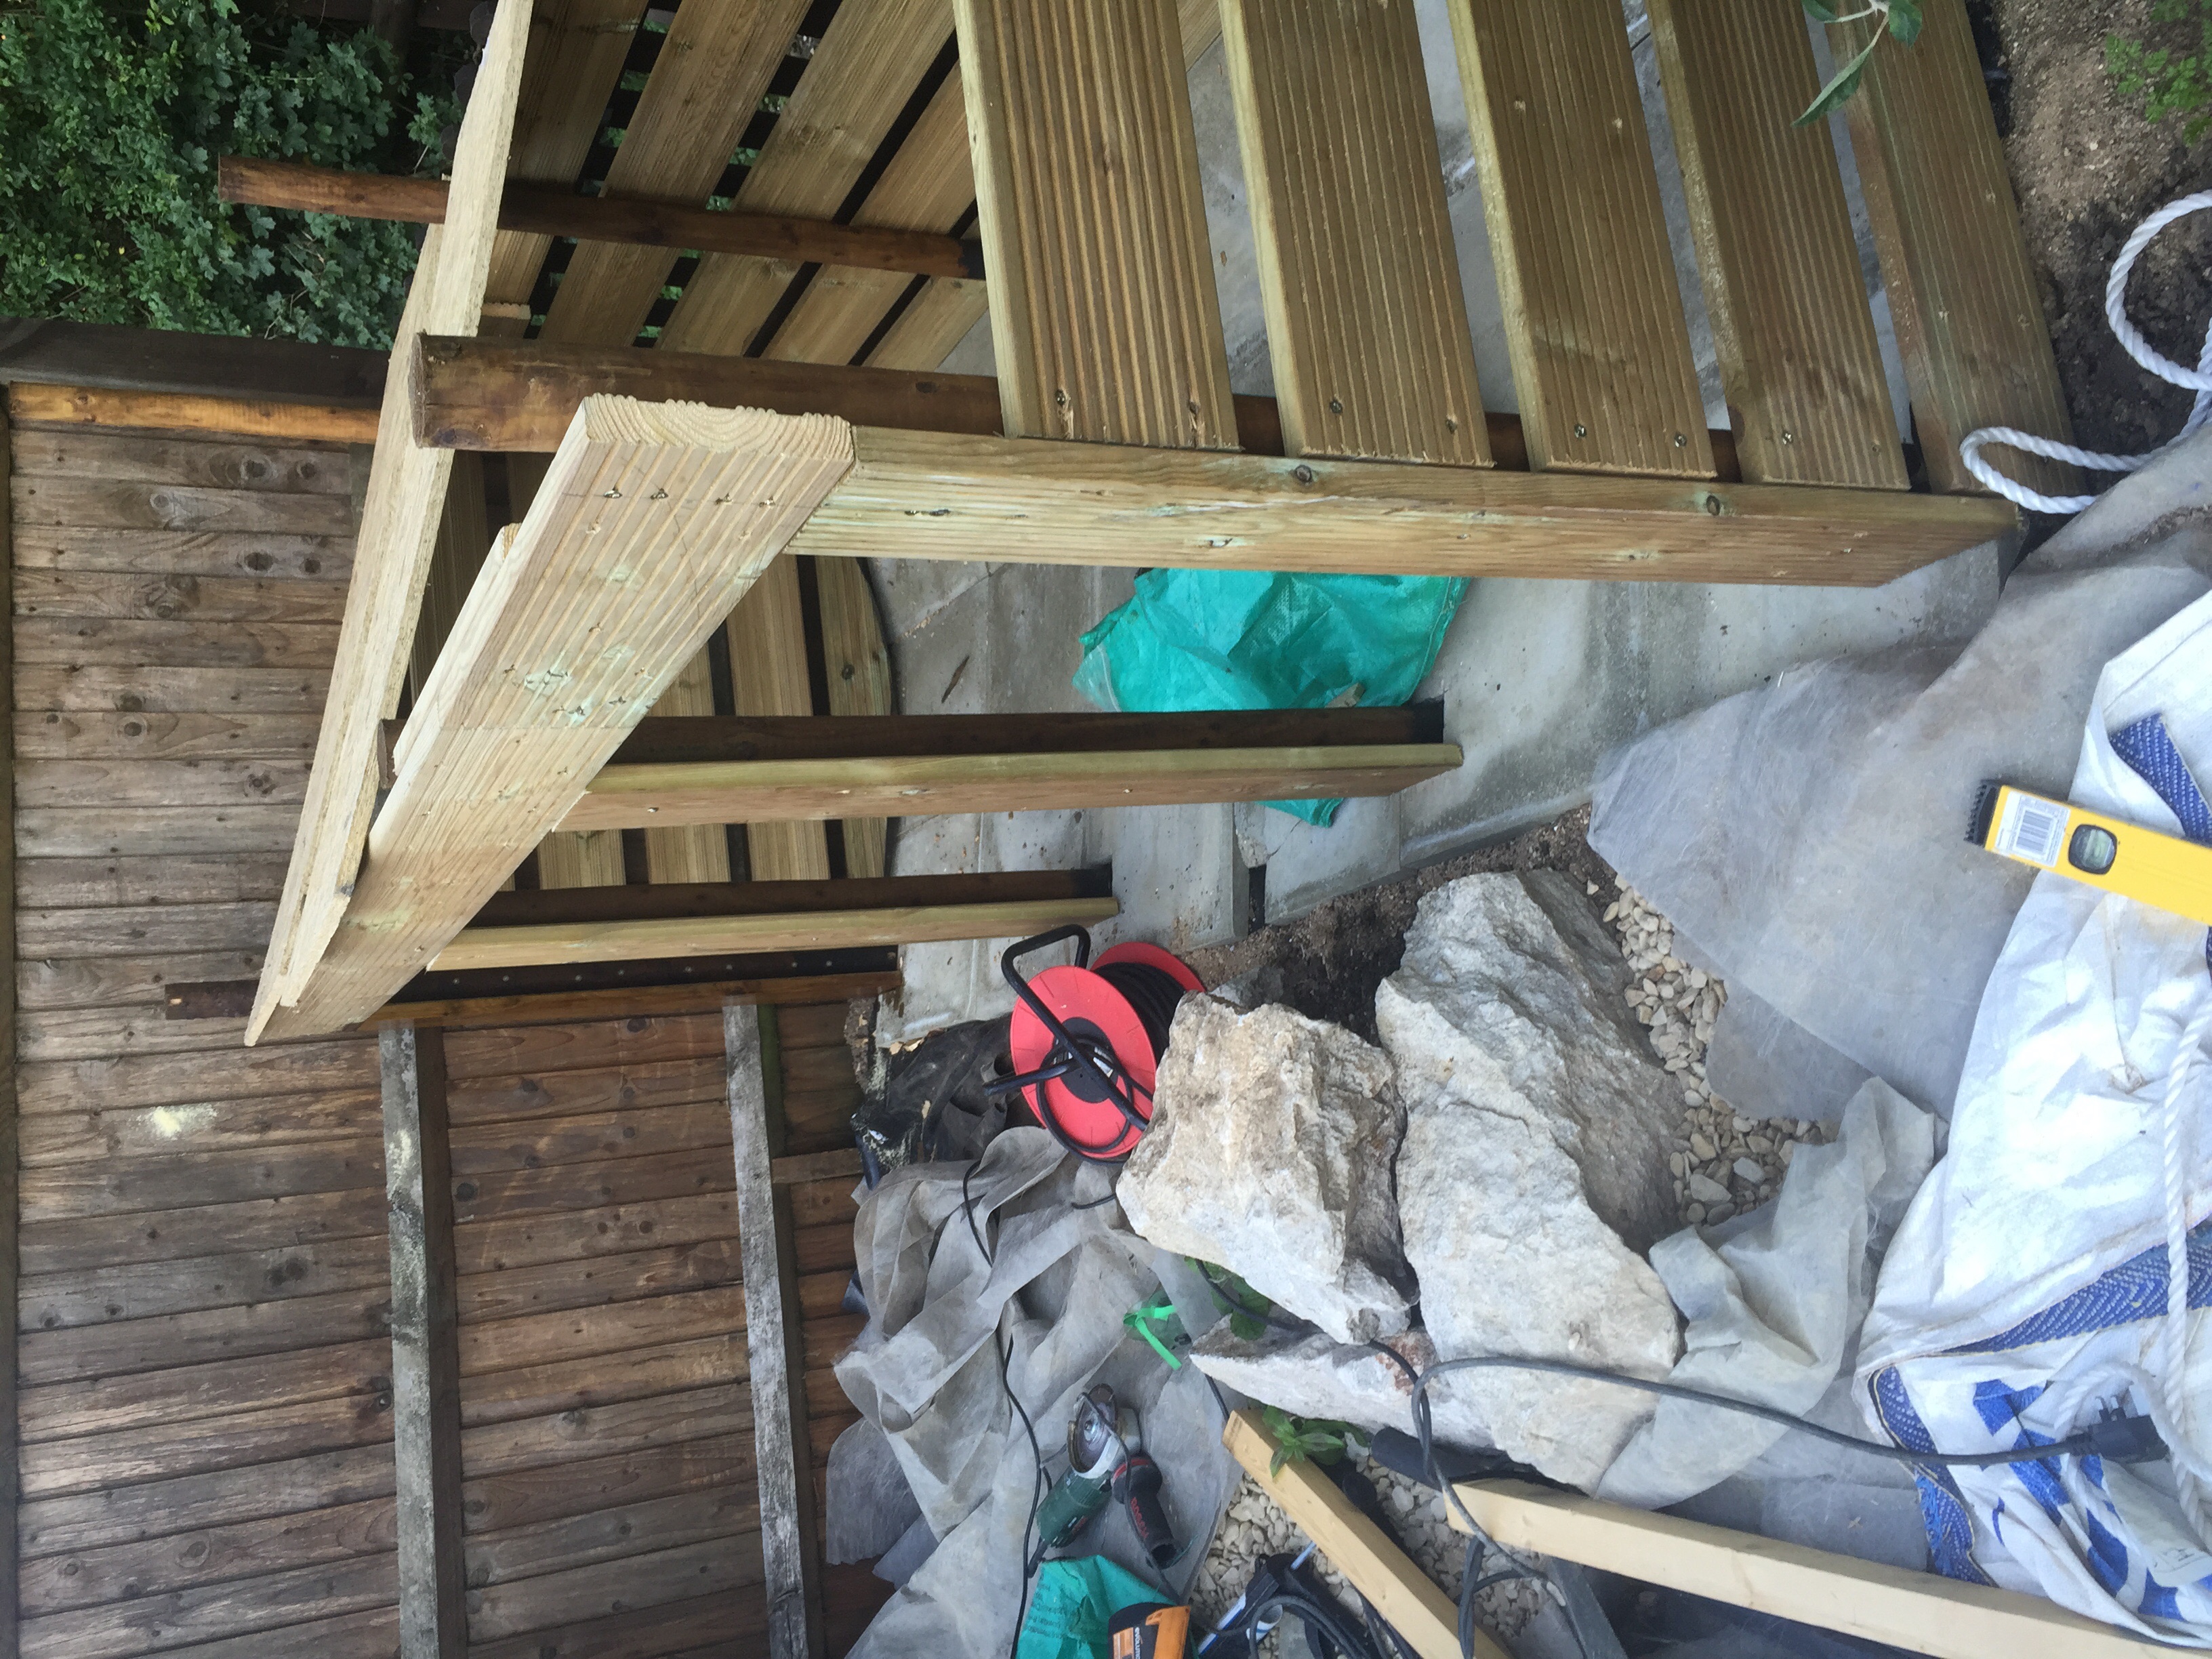
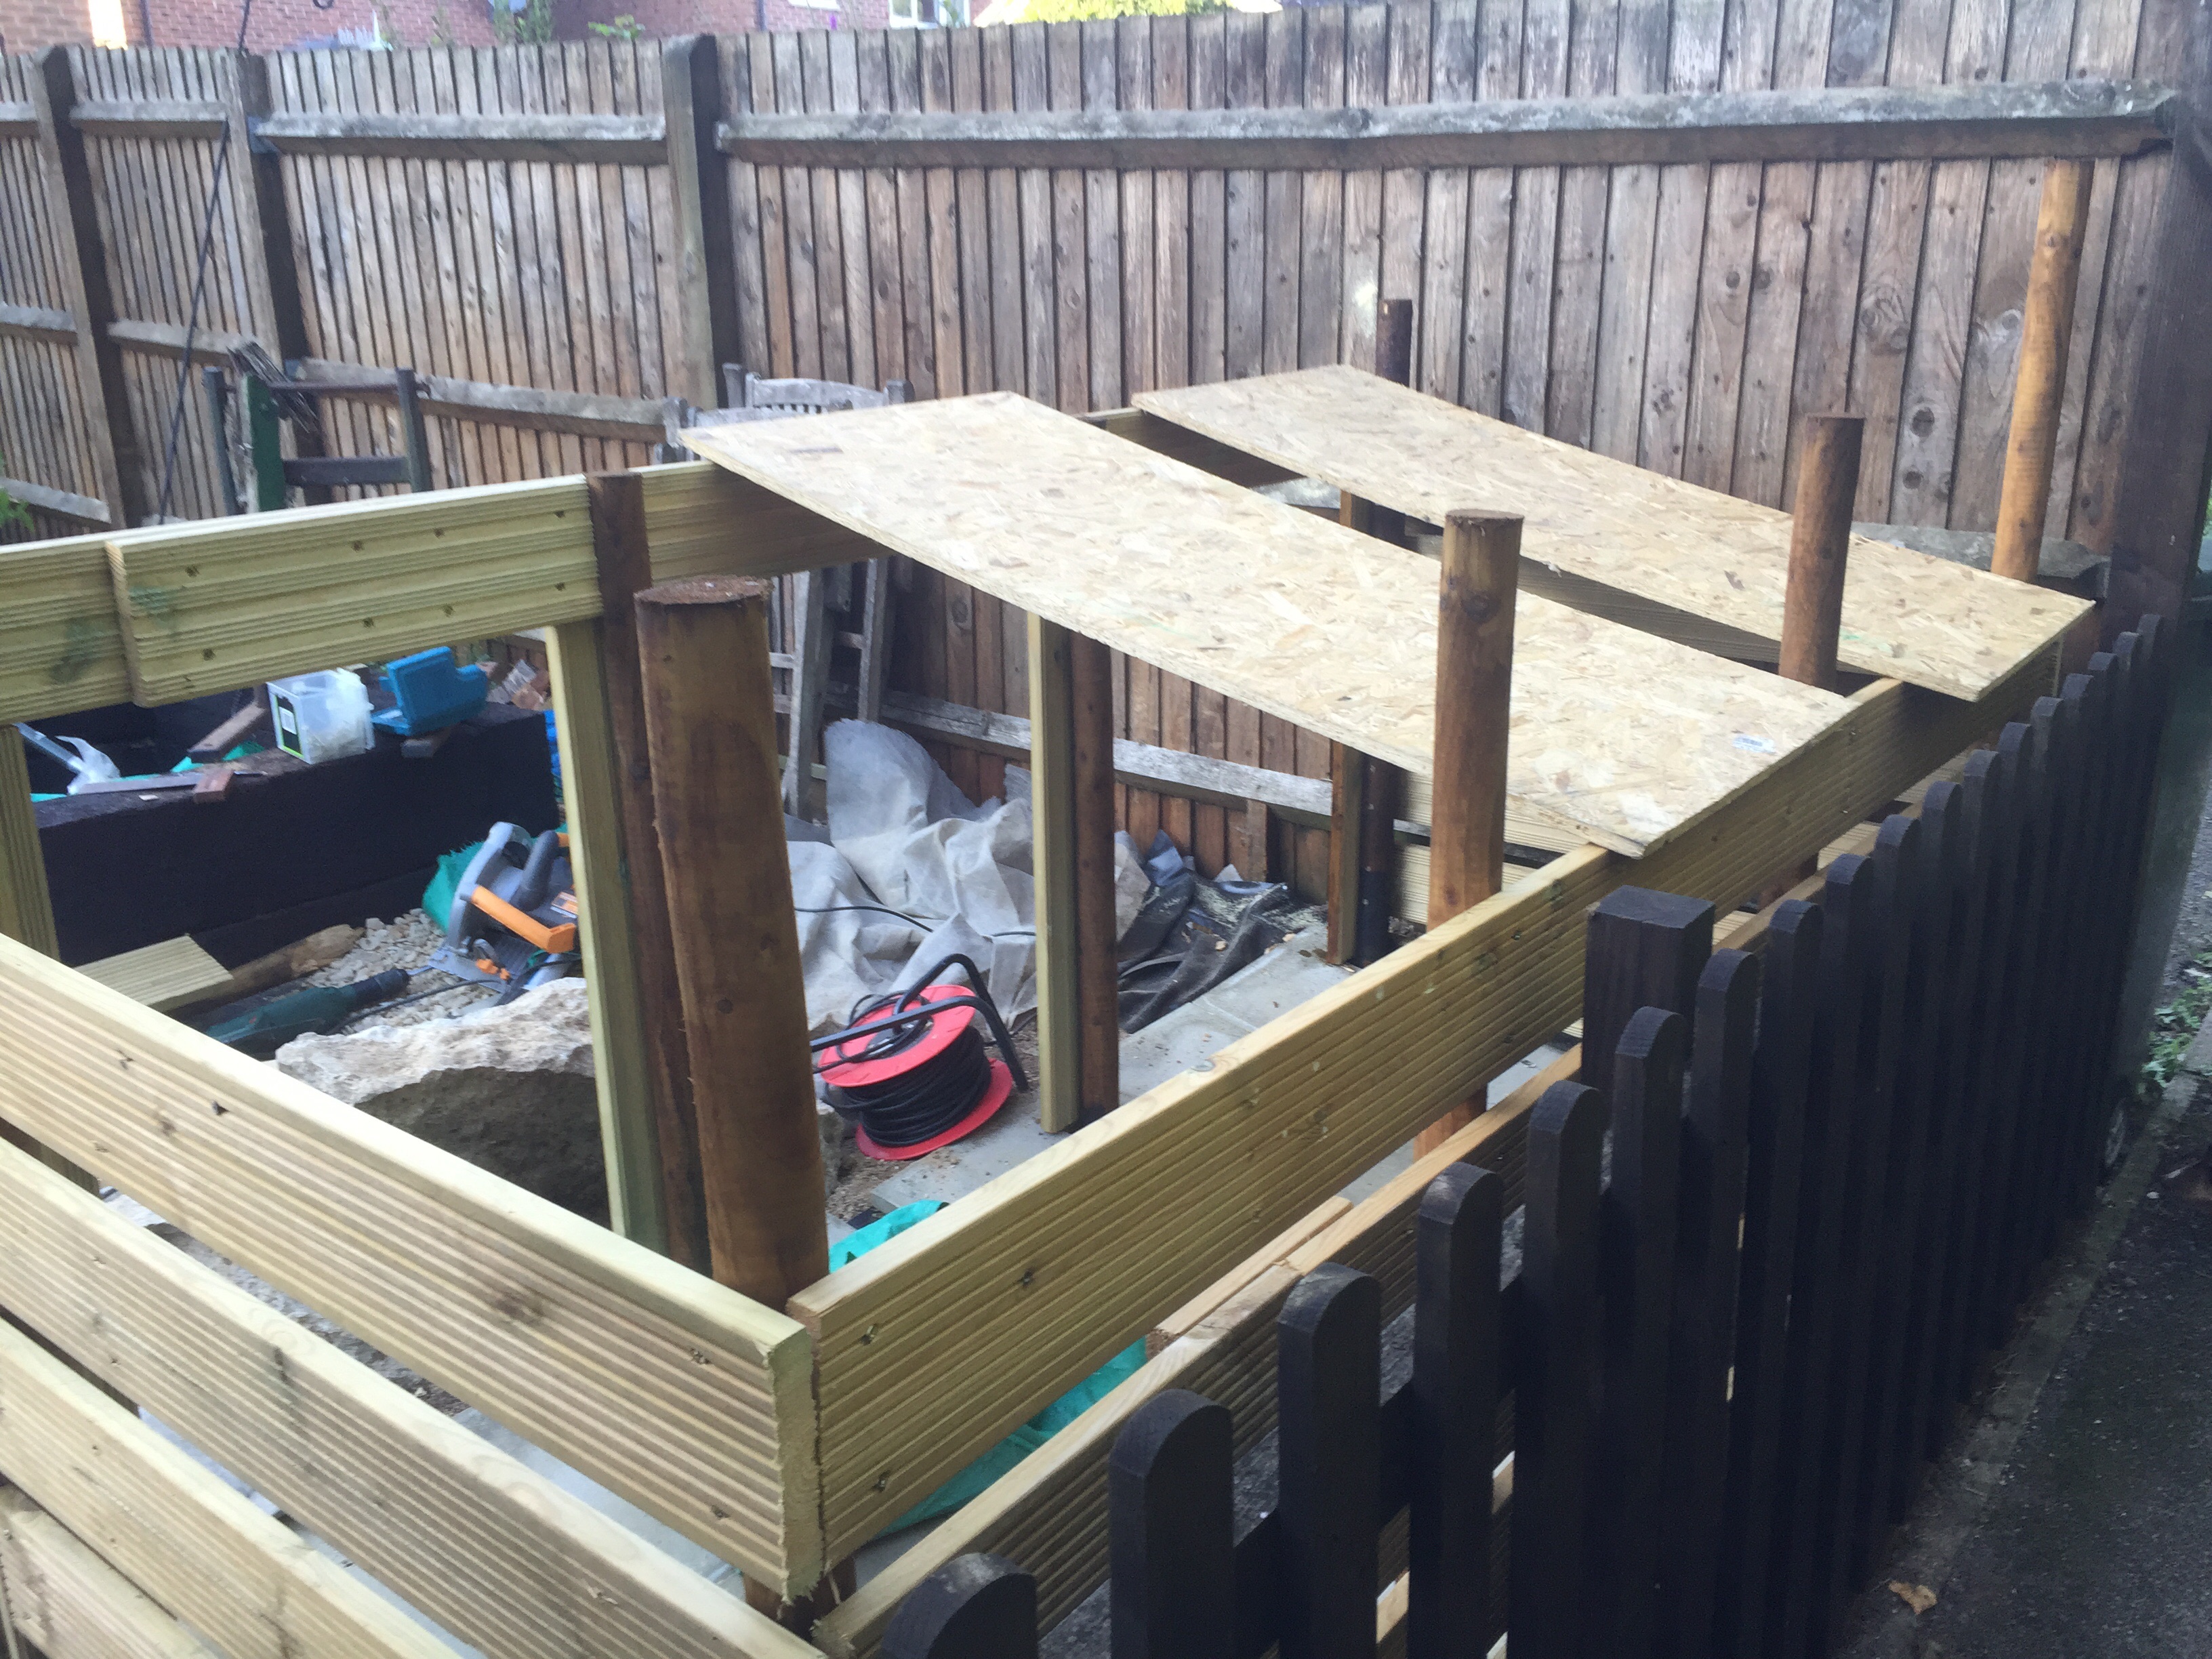
For all these reasons I thought it would be better to use a piece of decking across the top. True, it was deeper than I'd originally envisioned, but it would also match the uprights.
First stage was to get the posts pulled into alignment. The easiest way to do this was to use what I'd call a rope vice. Not sure if this is the correct name, but it's basically a loop of rope round the outer posts that you insert a stick into and then wind up. It's crude, but very effective. Annoyingly I forgot to take a picture on this, but I'll rig one up to show what I mean in a later post.
Once the posts had been pulled into the proper alignment I used a spirit level on the decking plank and screwed it to the posts across the front. I have to admit, I did use a fair number of screws when I did this. I knew how much tension the rope was under and wanted to make sure the plank wasn't going to move :-)
Fitting the cladding
Once that was in place; I measured, cut and fitted the front uprights to clad the posts using more decking. This isn't just to make the front look good, although it certainly does that :-). It also provides the lip that will hold the front slats in place once the bins began to fill. Have to confess that this last bit wasn't my idea but Andie's. It is a very neat solution.
Final action for the day was to stain the from with Crecote Light. This isn't to preserve the decking which is already pressure treated, it's to help it blend in with the rest of the wood work in the garden.
Overall I'm very pleased with the results.
Next Stage
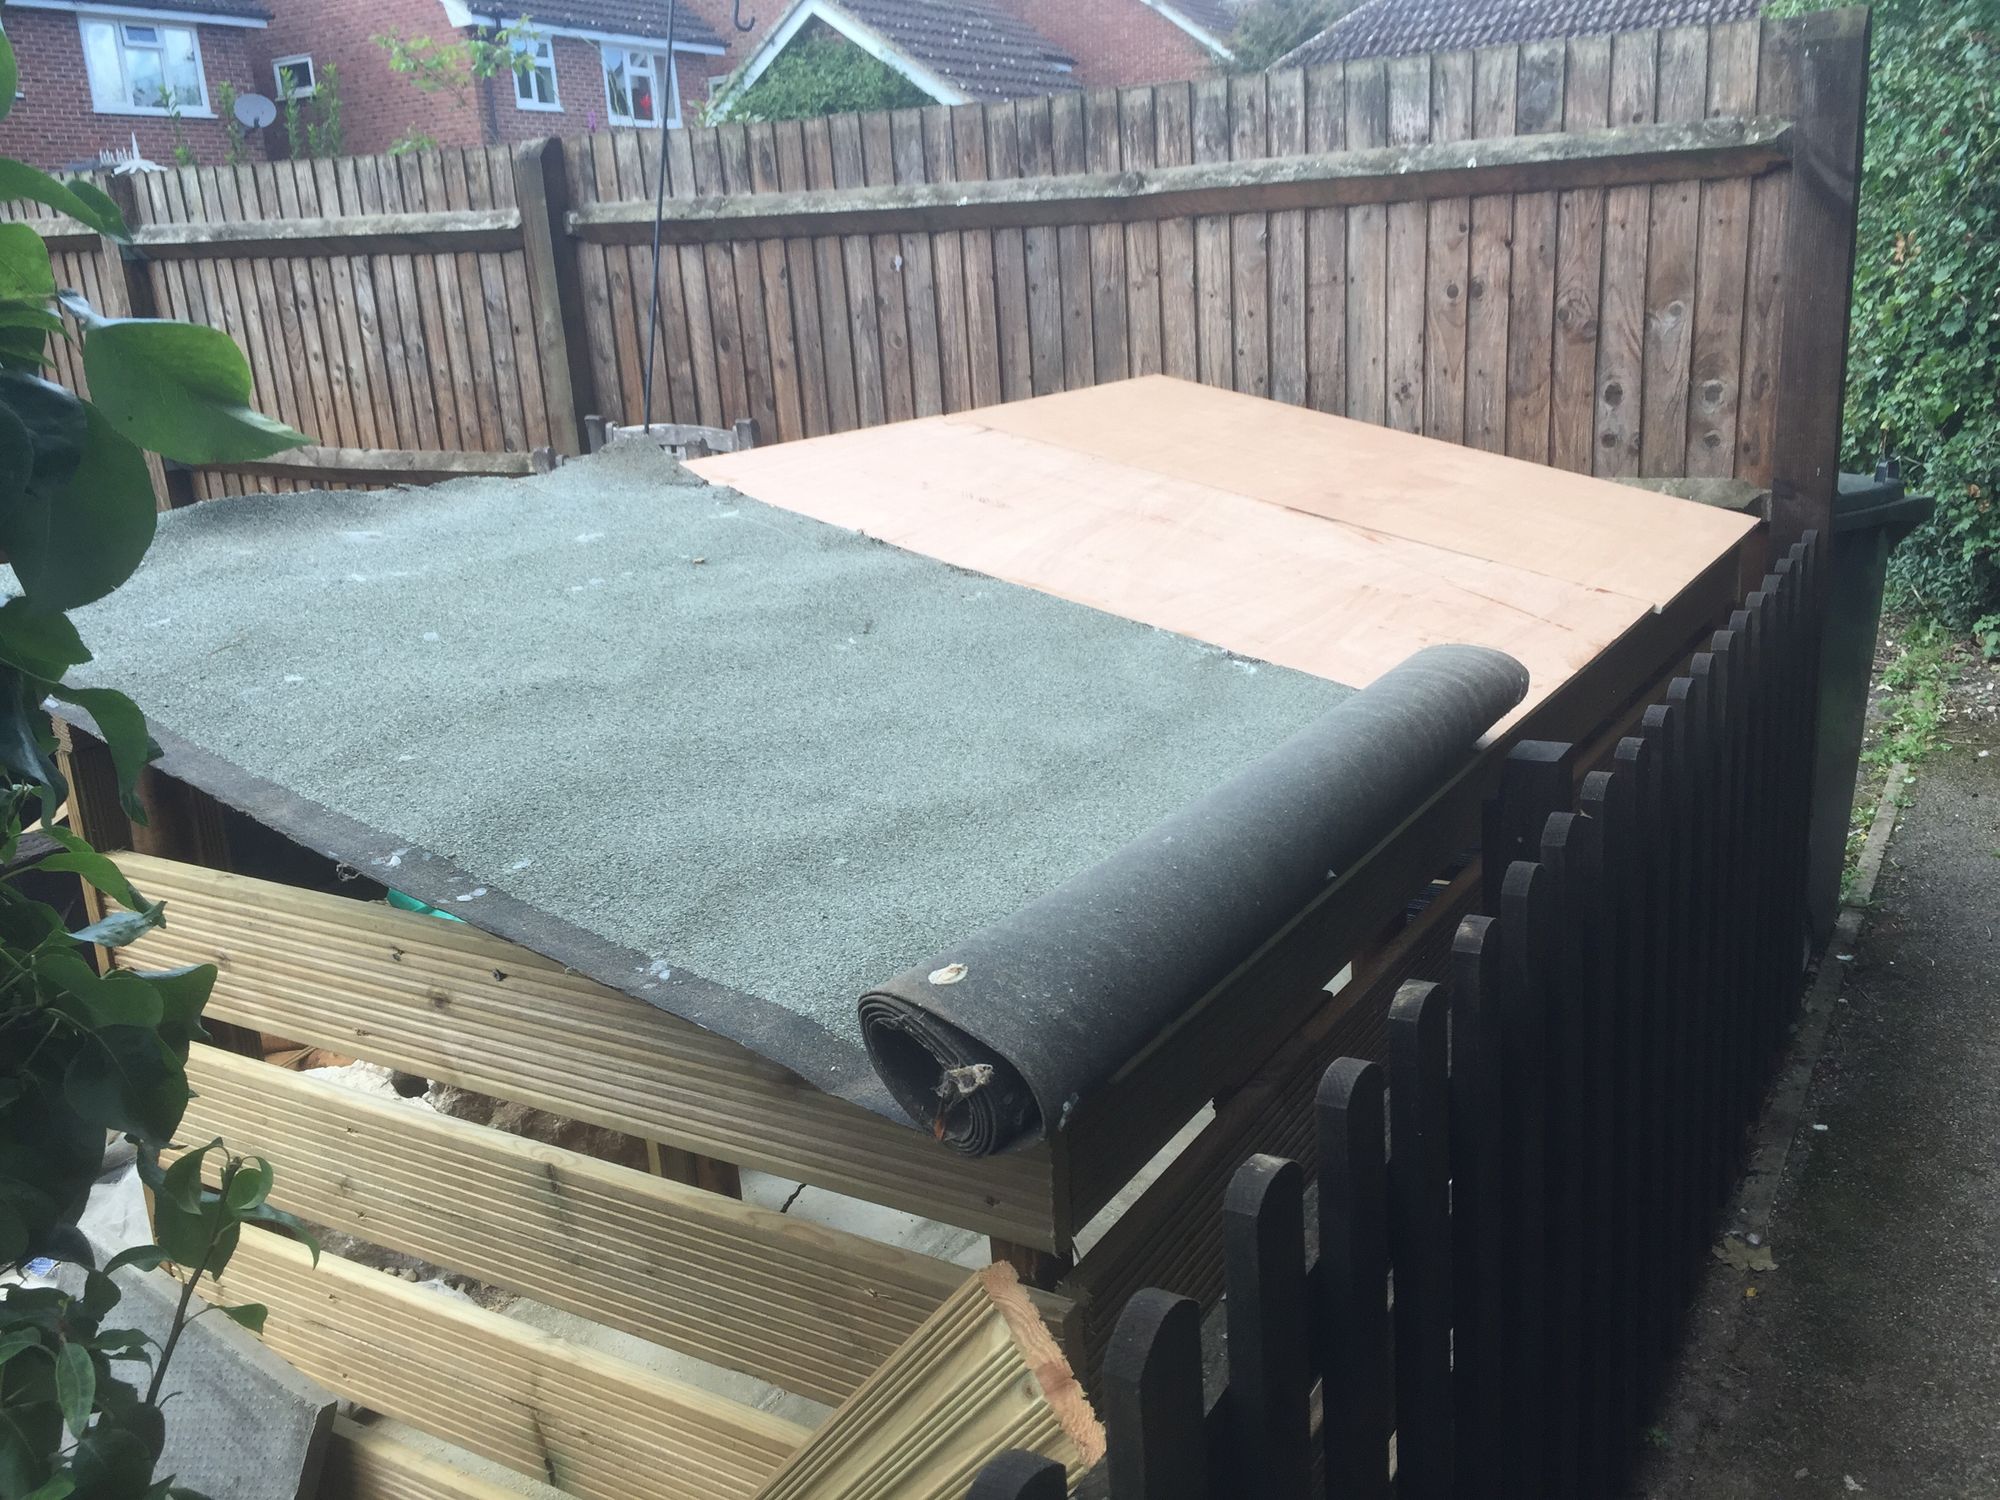
The next stage will be build the roof from the scraps of ply board and roofing felt we've got at the stables :-)