Compost bin lids

This week we're building lids for the compost bins to keep the weather off the compost - but ironically inclement weather stopped us from completing them this weekend :-)
It wasn't much to be honest, but even drizzle isn't a good idea when your working with untreated wood or thinking about painting things. About the best you can do pack up and put the kettle on for a cup of tea until it's passed :-)
Scavenging materials
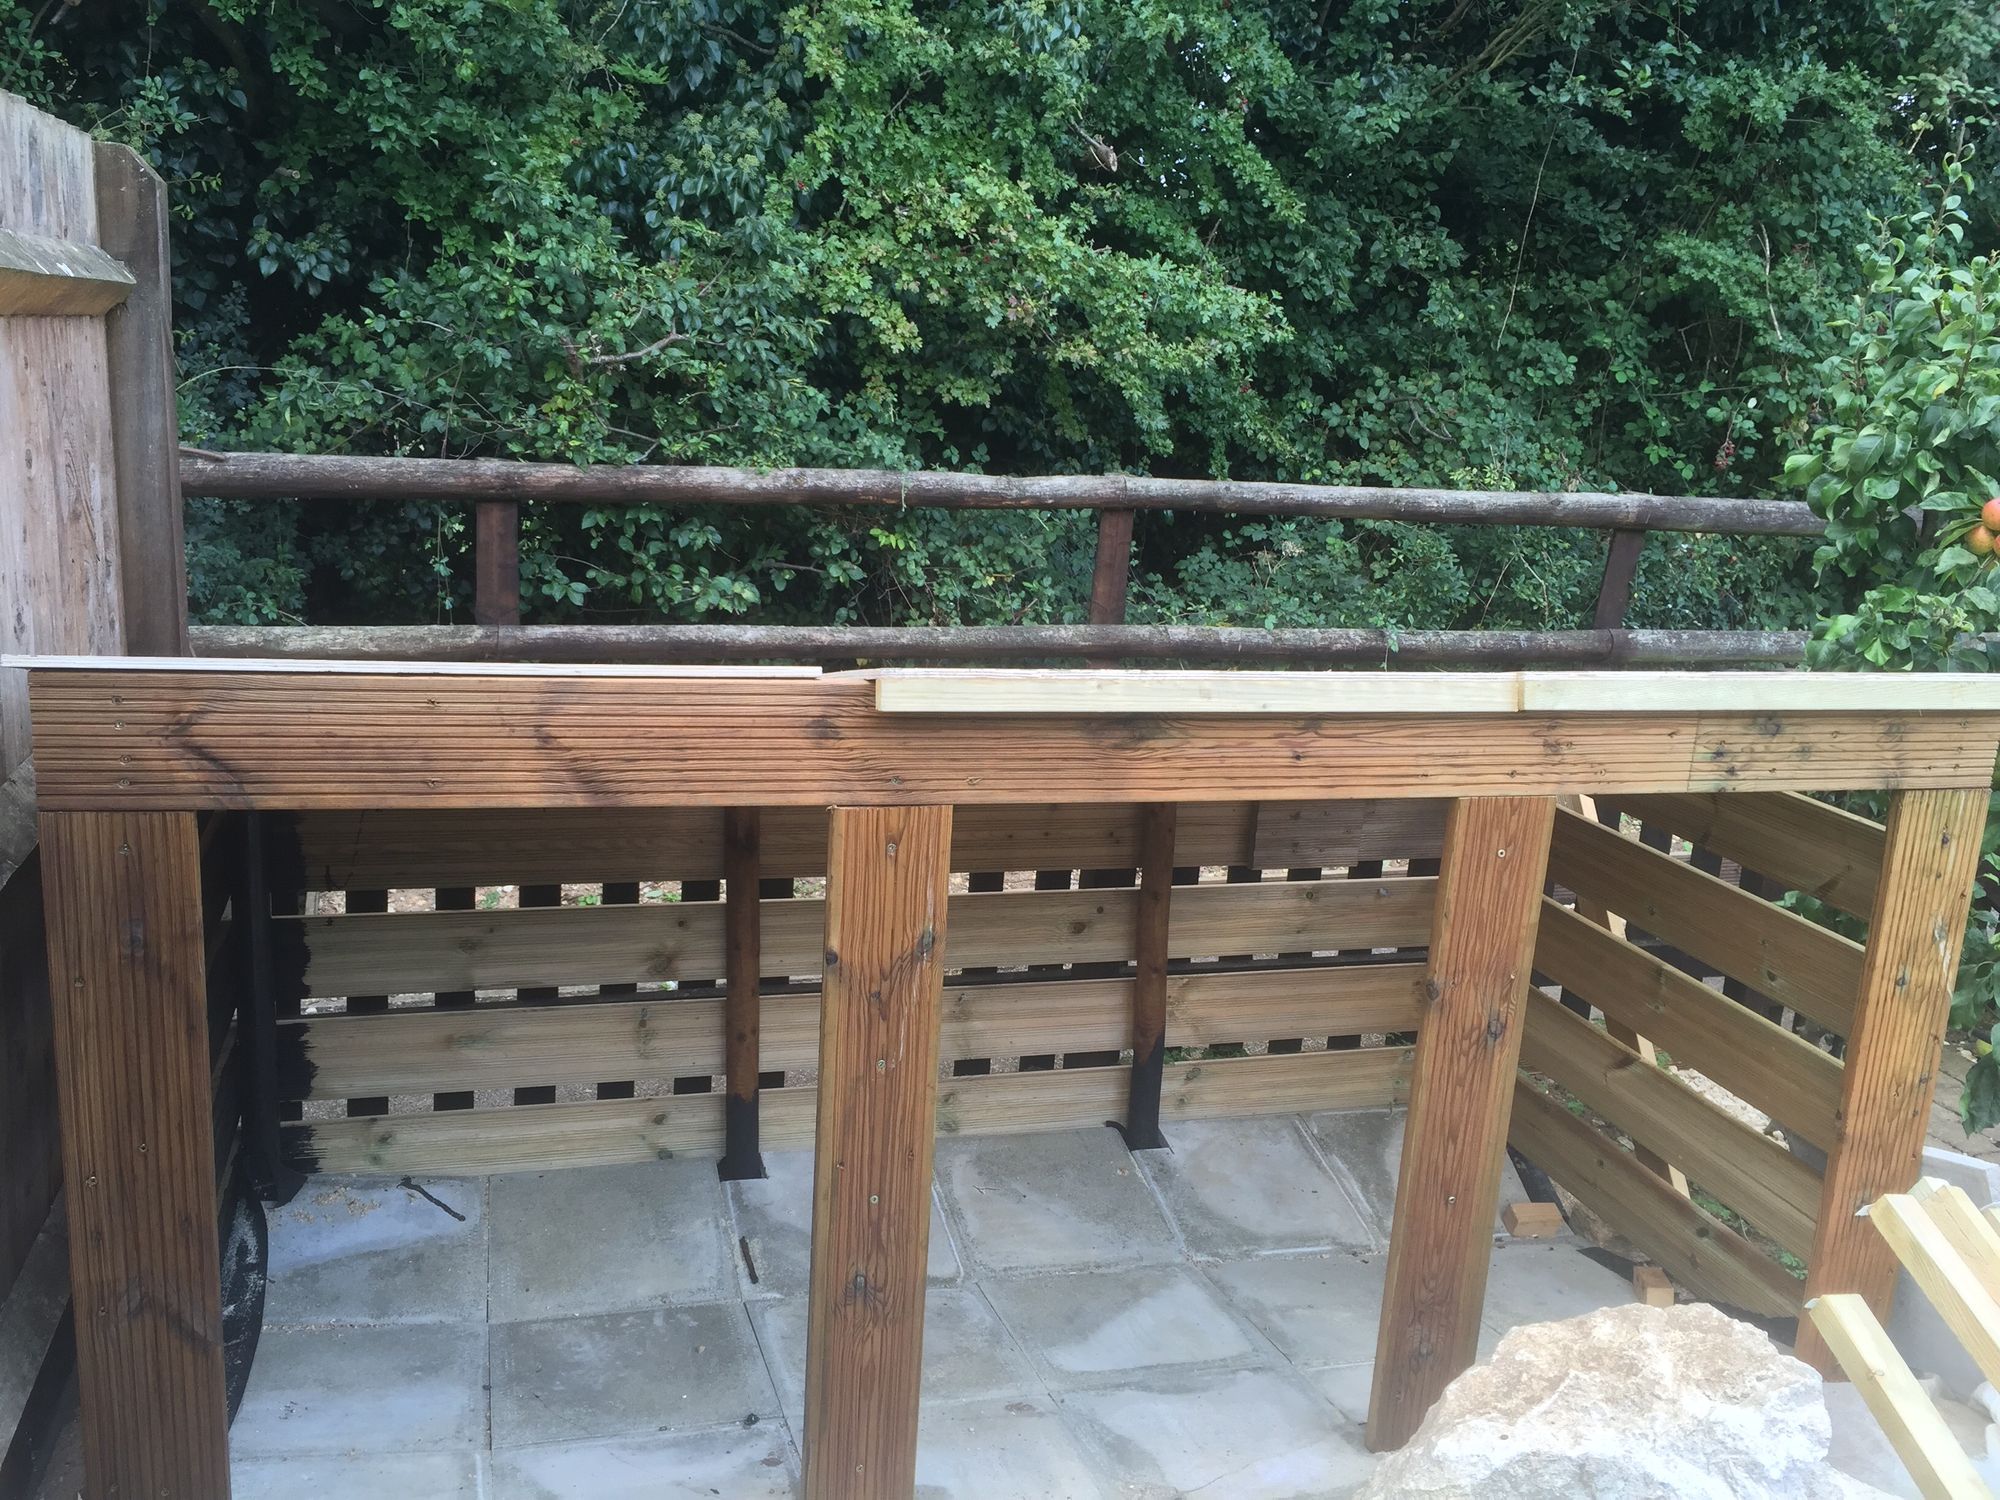
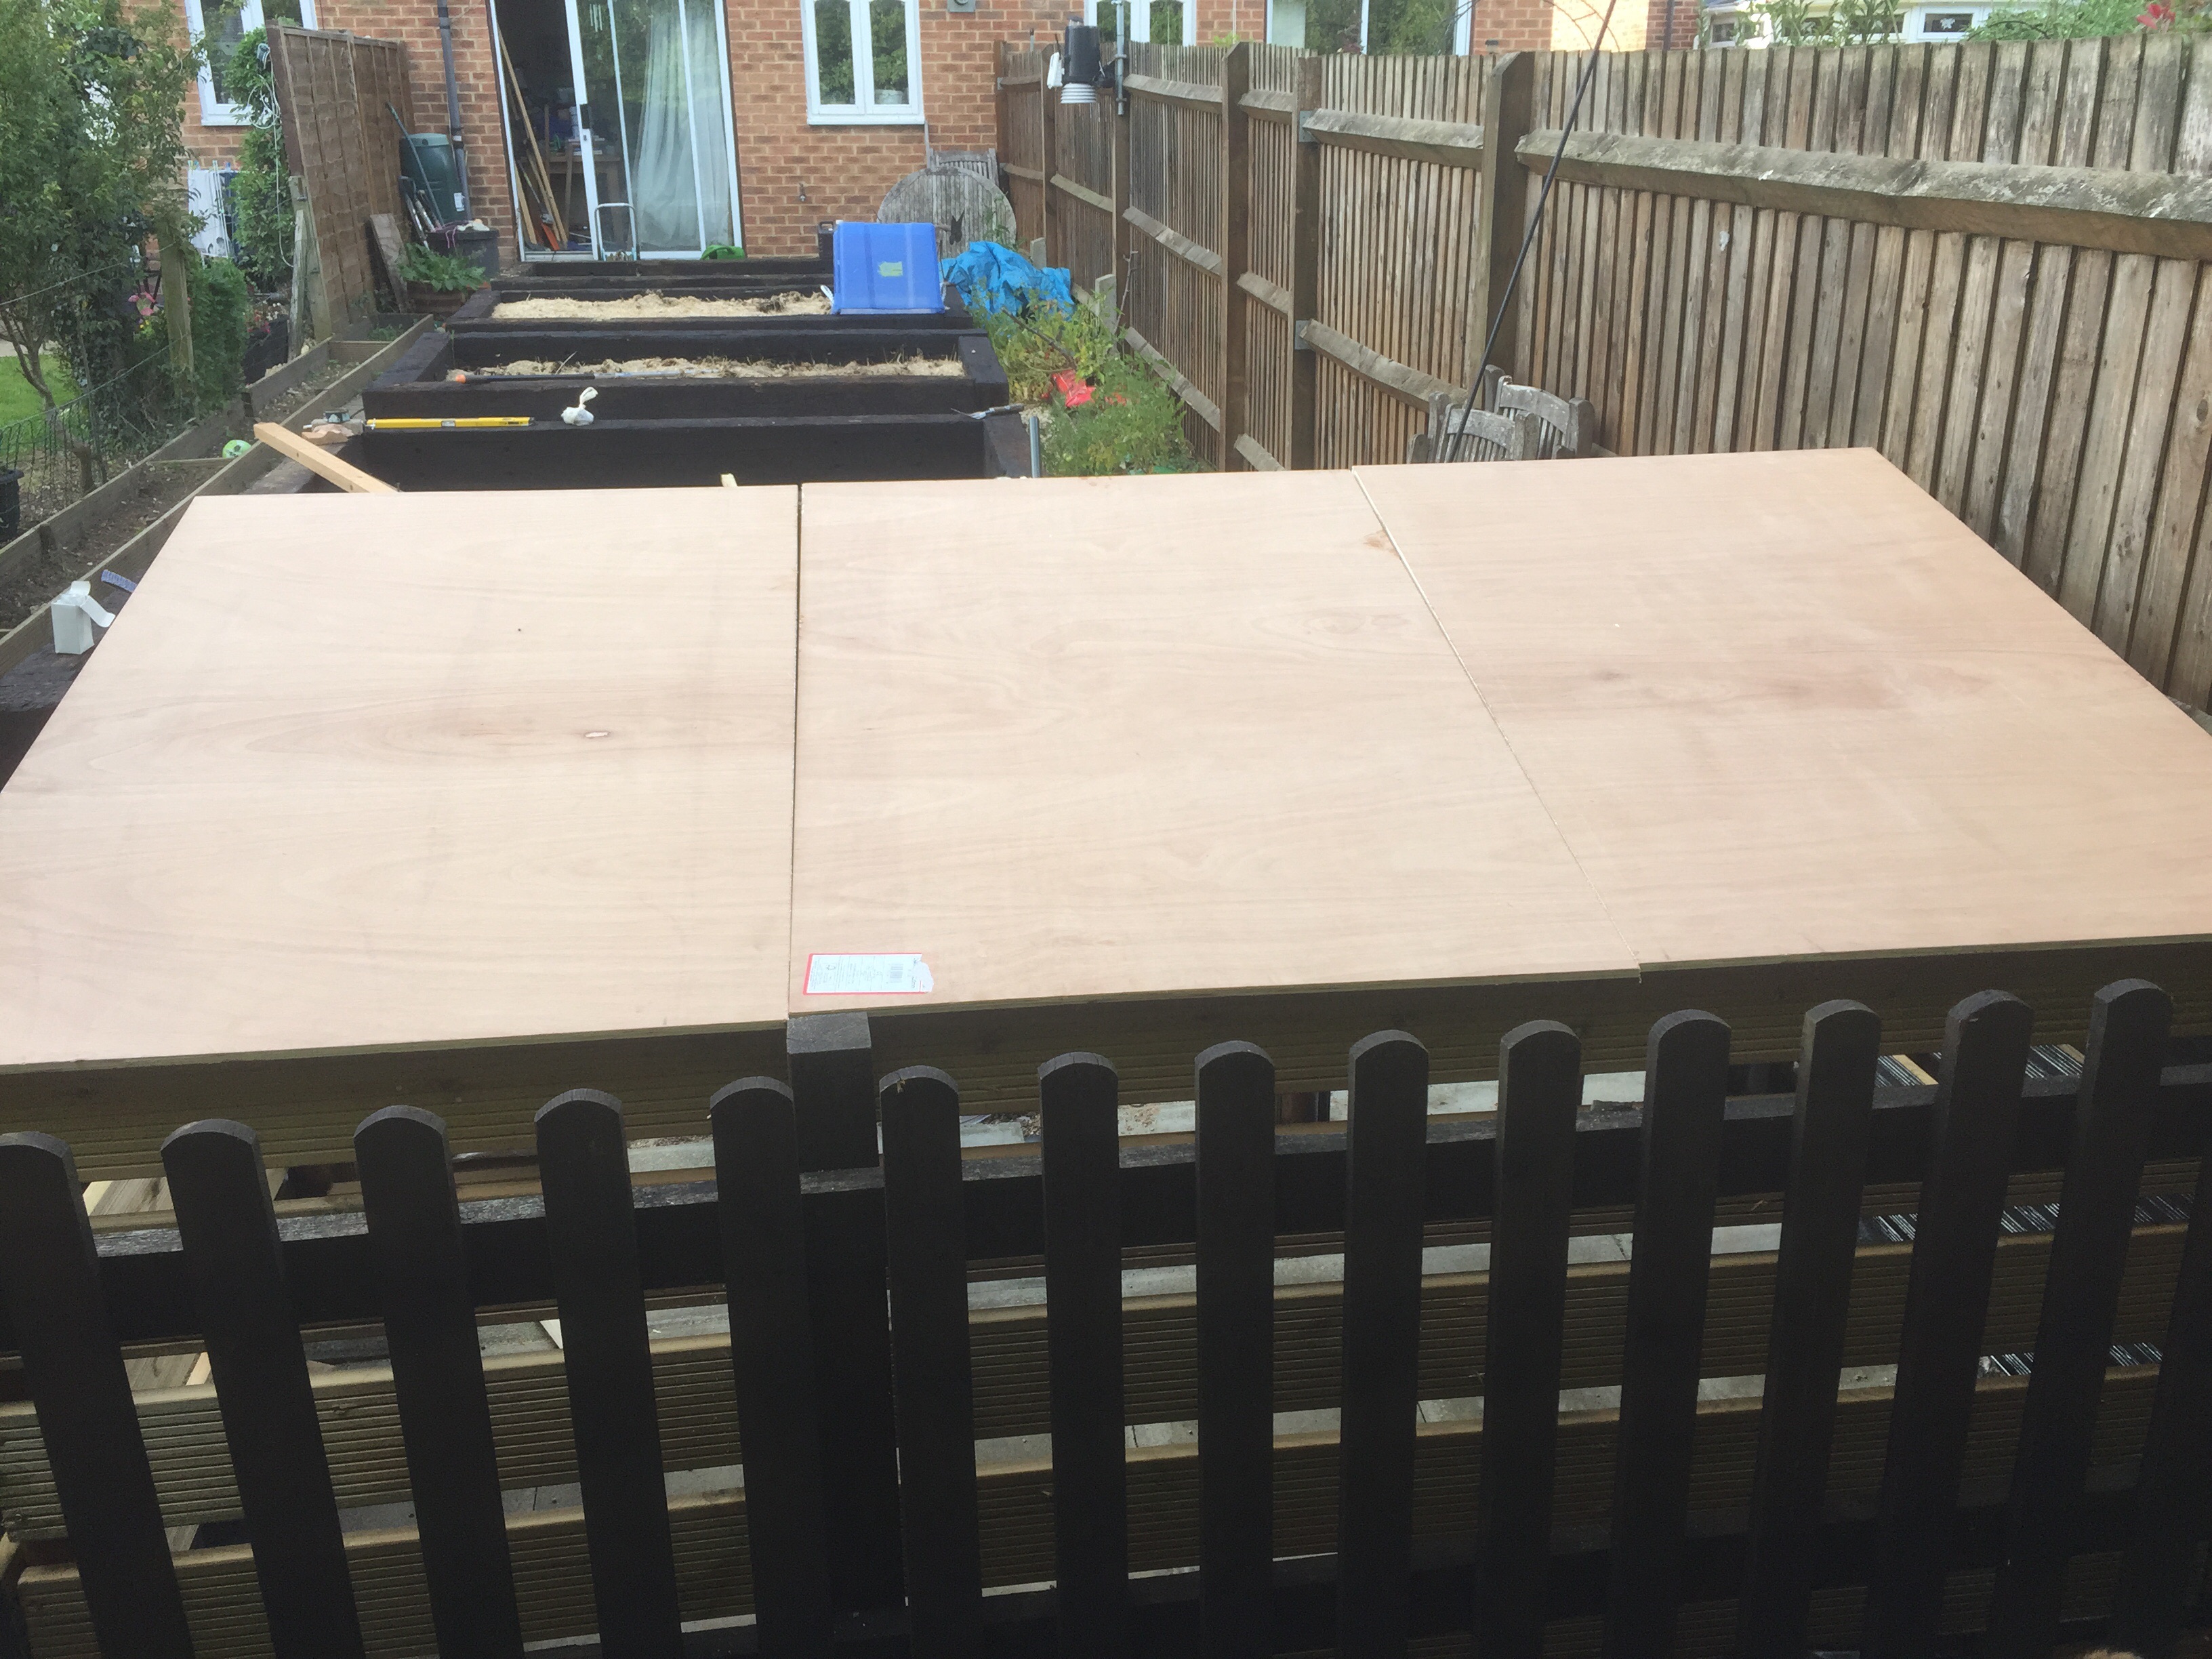
Saturday morning we sorted out the plywood for the lids of the compost bins. We had some sheets down at the stables that had been salvaged from an attempt by a previous resident to build a tack room. We cut them into 3 panels of 810mm x 1220mm. 1220mm was picked because it happened to be the existing width of the boards, and it fitted perfectly across the length on bins. The bins themselves are 800mm wide, so 810mm gave the lids a bit of overlap at the edges and allowed for the fact that the bins aren't exactly square. They're slightly trapezoid - things like this happen when you make your bins follow the edges of the garden and it turns out the garden isn't square :-)
Hinges and things
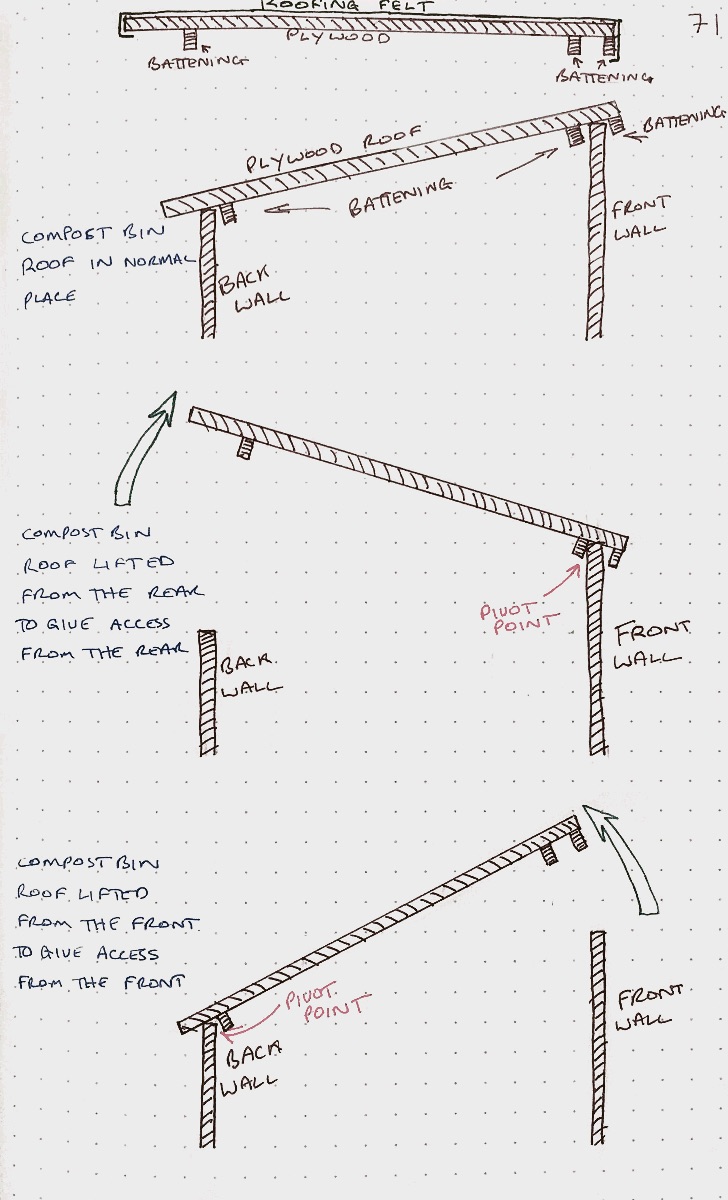
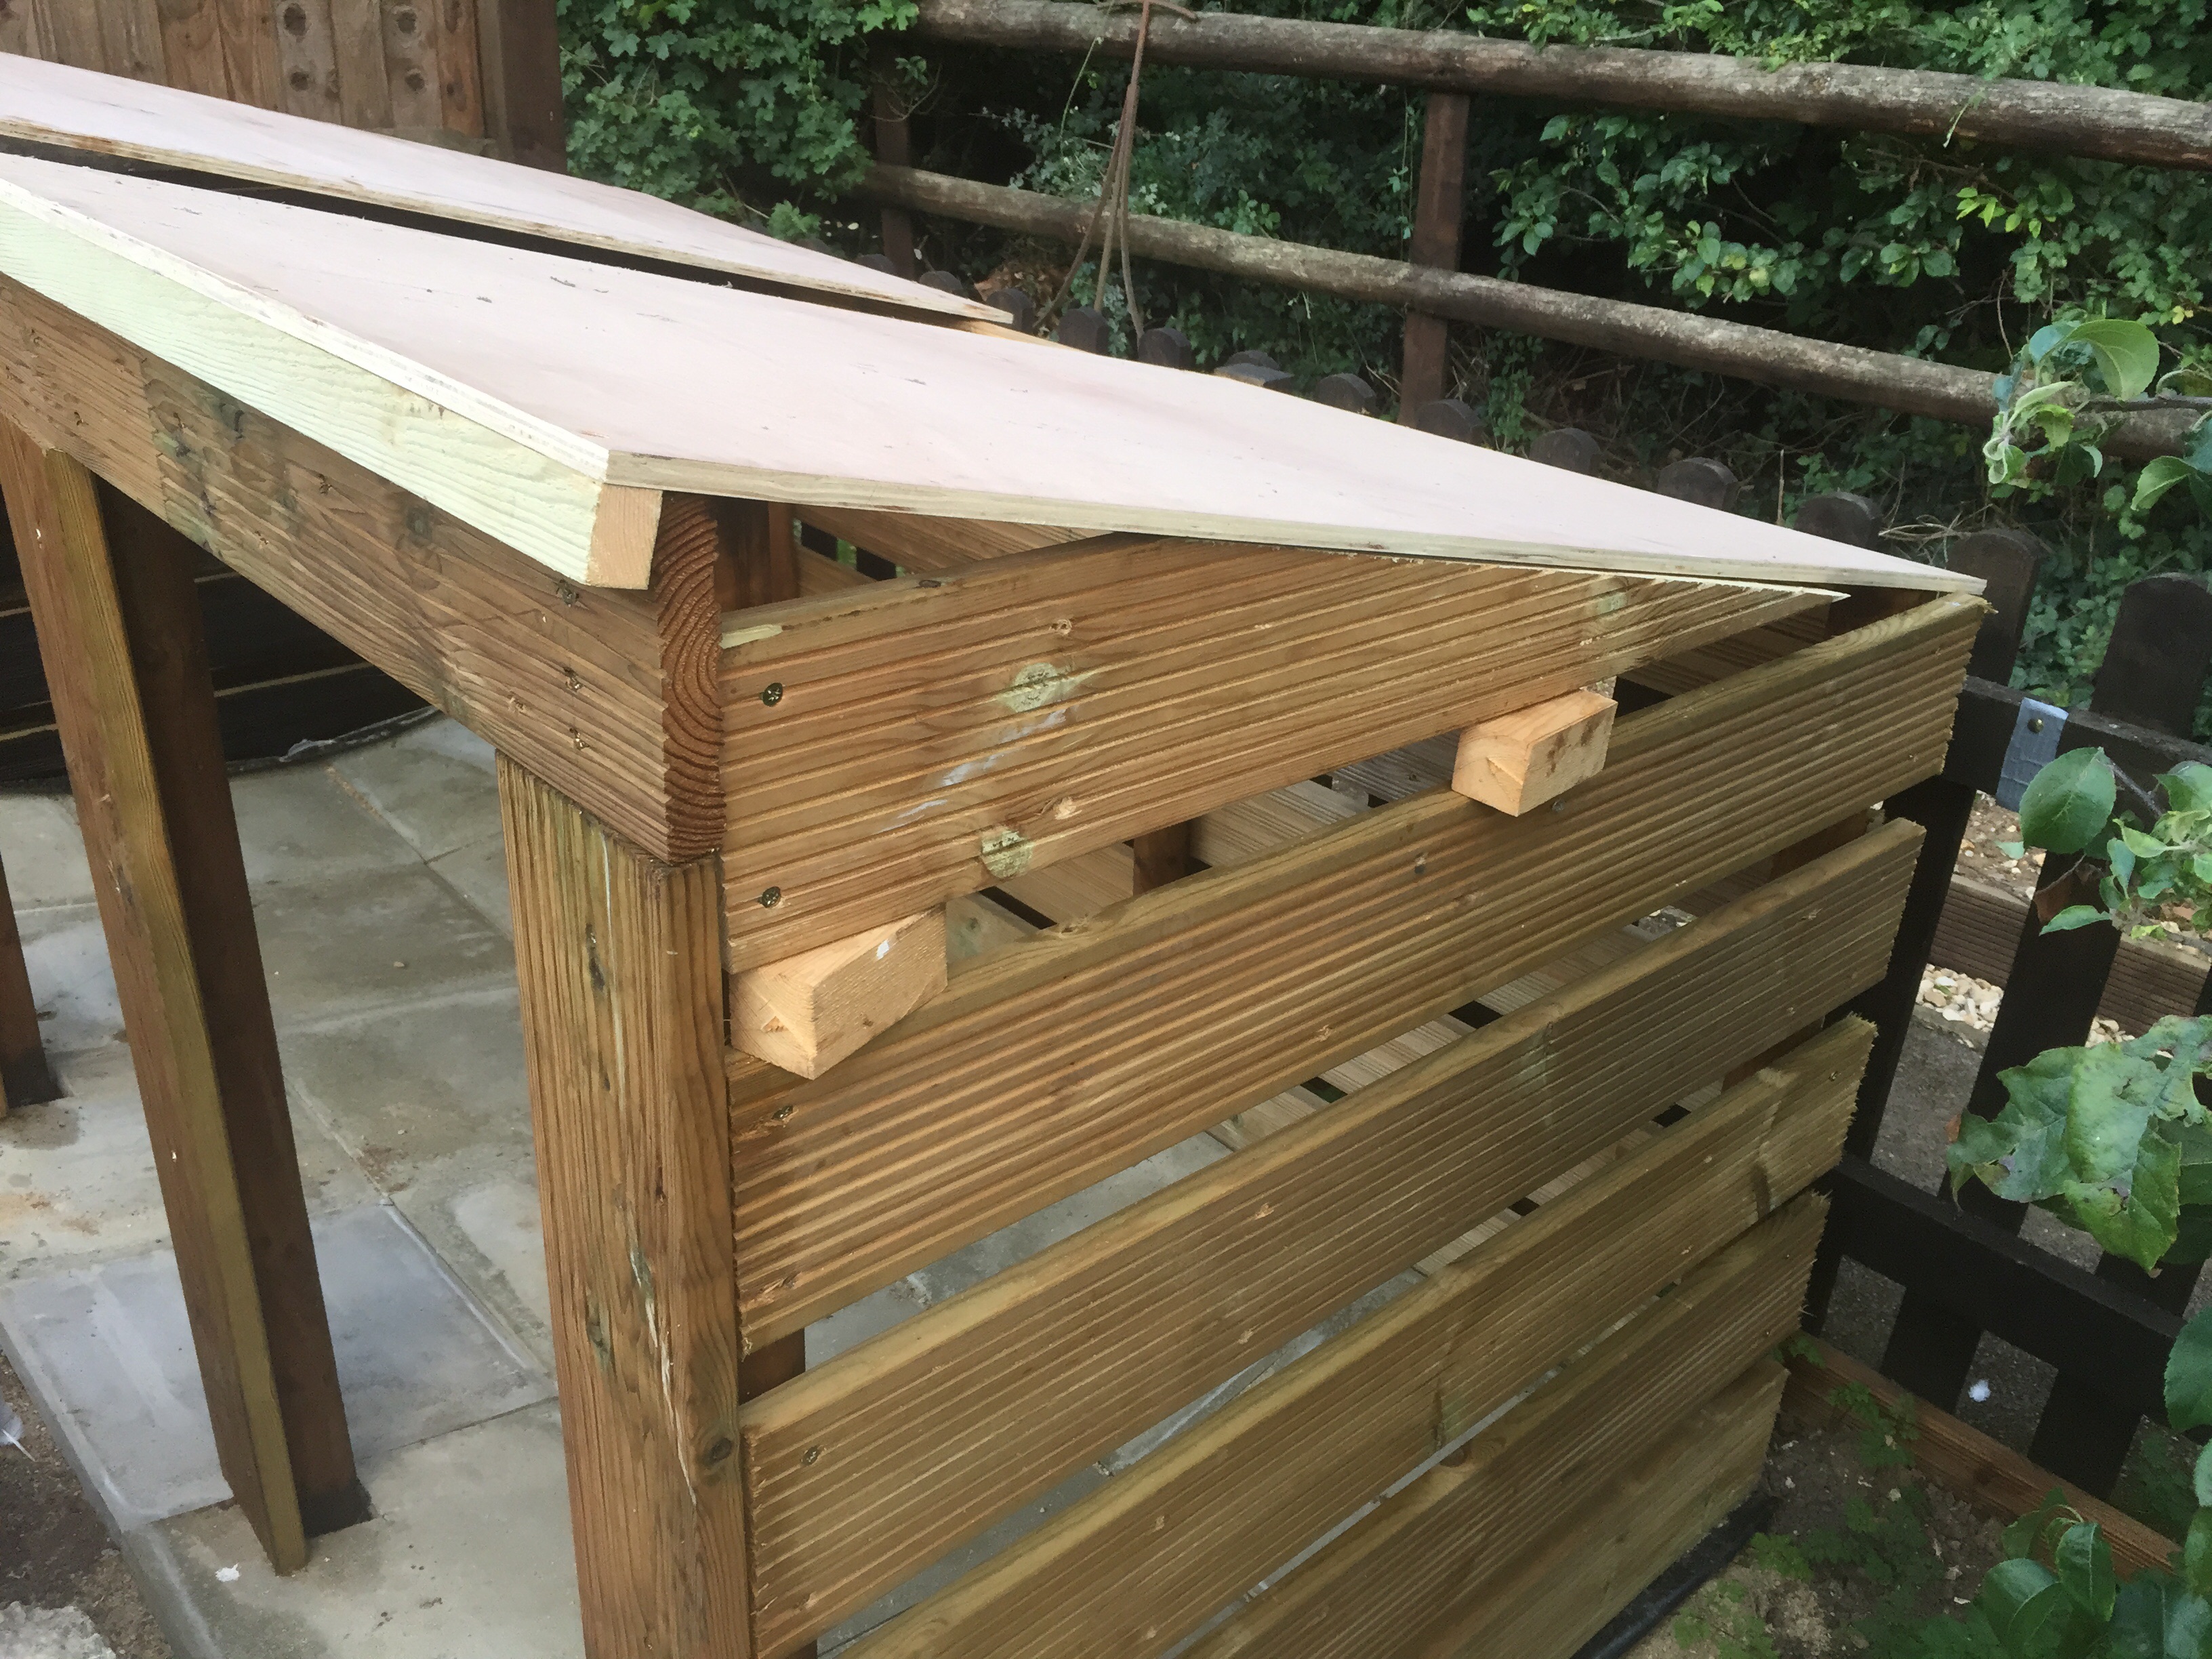
We want the bin lids to be openable for either the front or the back, and to be completely removable. Using hinges would have been way too complicated ... and expensive. So instead we decided to put battening on the underside that would bracket the cross members between the posts. That effectively give crude hinge that allows the libs to pivot without falling off when you lift it. The secret here is the spacing. Too little space between the battens and you won't be able to pivot the lids, too much and the lids will slip around as you lift them.
Starting to build the lids
First up was the front battens. Getting the front battens on meant we could place the lids on the bins and fill in the gap in the wall near the top. We couldn't do this before because we needed the roof in place to gauge the line to cut the side timber.
Roofing Felt and waterproof lids
We don't know exactly what sort of plywood we've got, so we were going to cover them with roofing felt, stuck down with bitumen, to protect them from the elements. But that can't be done until the battens are all screwed on.
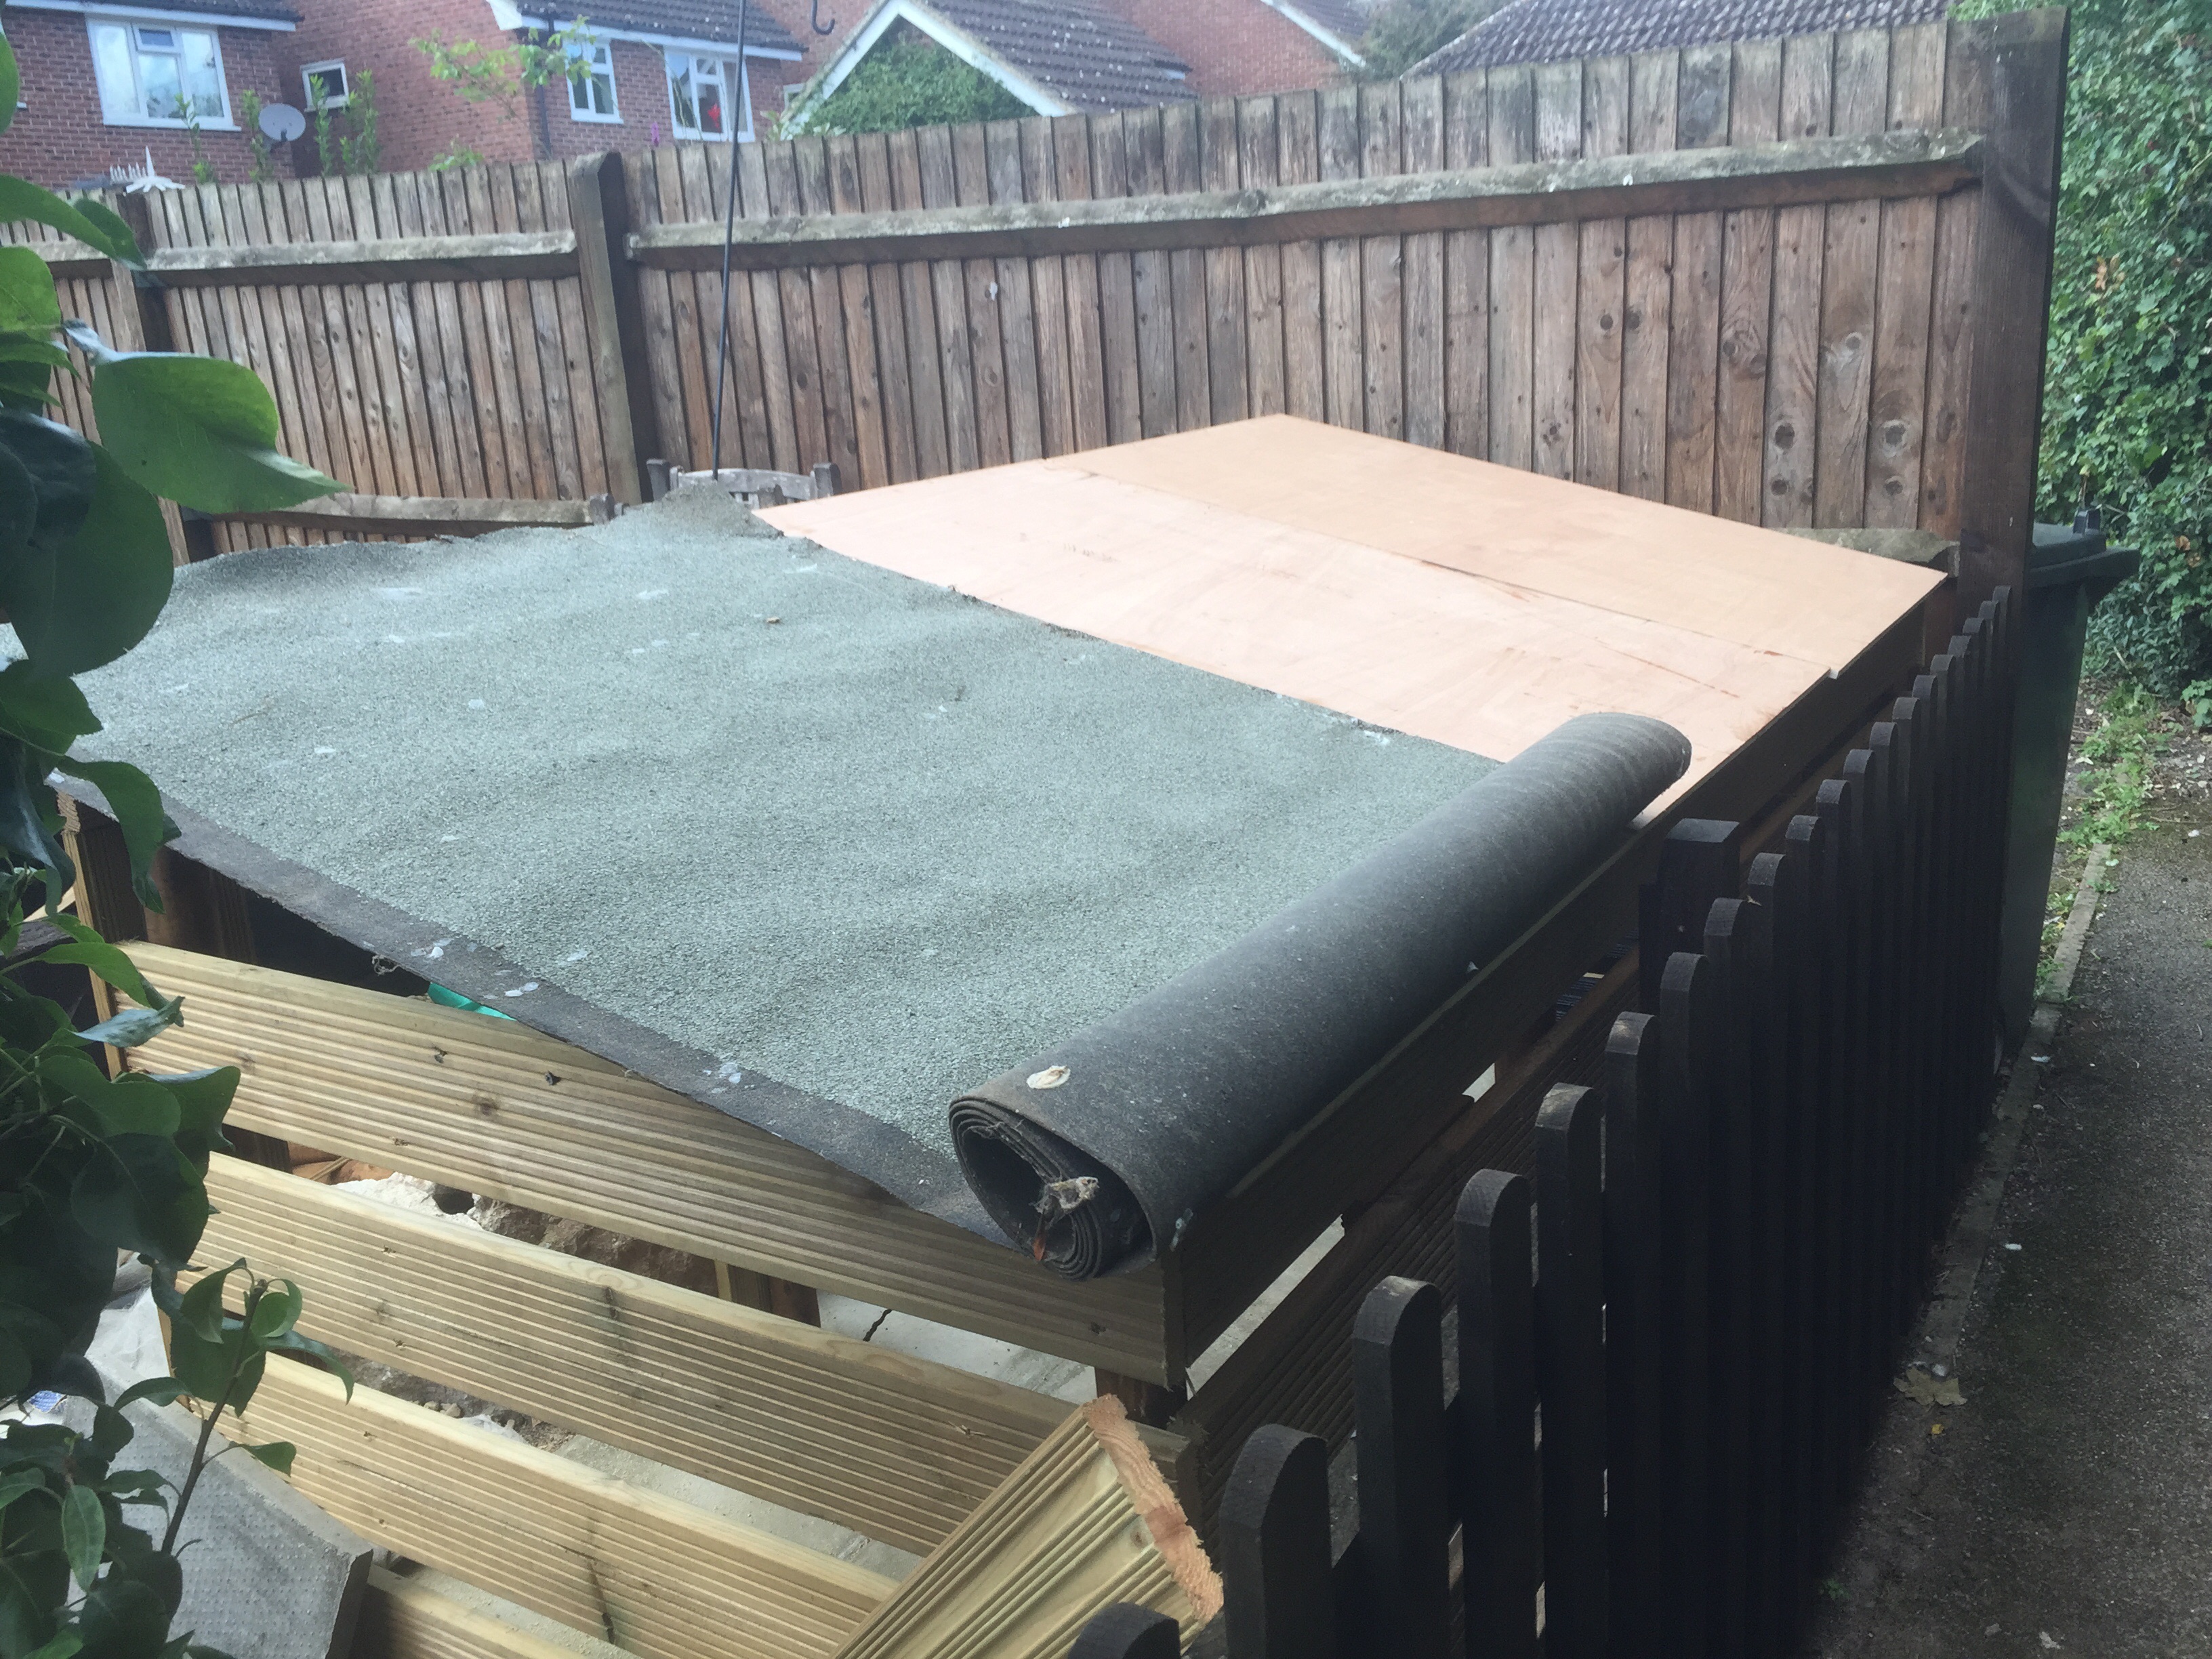
We have part of a roll of roofing felt left over from when we patched the roof of one of the field shelters in the horse's field. But until we've done that, they're not waterproof and if it's not marine ply we really don't want them to get wet.
Typically of course, we were just starting to measure up for the rest of the battens when it started to rain. And as mentioned, untreated timber and rain are not a good mixture :-(
It also meant we couldn't continue to paint the inside surfaces of the timber on the bins themselves either. Rain, and paint ... also a bad combination.
So play was stopped at that point and we adjourned for tea. I hate to think how much tea has been drunk during the building of our composting bins :-)
"If things go wrong, don't go with them." - Roger Babson